
By Carl Radford, RPT
A few years ago I needed to order three grand Dampp-Chasers for an upcoming installation in a church, so I called the supply company, and placed my order as usual with the receptionist I'd gotten to know over the years from Piano Technicians Guild meetings.
“So, that’s three G6-PS-38-SB grand Dampp-Chaser systems.” Then with a grin in his voice, he said, “Sounds like you’re going to be spending a lot of time crawling around on your back.”
He was right, of course, but since I enjoy Dampp-Chaser installations, crawling around on my back, as he put it, is fun for me.
The part that wasn’t always so fun was getting the equipment to the site. I usually try to make it to the job in one trip, because often working downtown in the city as I do, going back to the car can mean a six or eight block walk and thirty floors up and down on an elevator, not to mention extra time on the parking meter.
At that time it was a balancing act pulling my rolling tuning tool case with one hand, carrying a work light with the other hand, with the Dampp-Chaser box under one arm, and an undercover package under the other arm, and to top it off, slung over the shoulder, a tool case devoted to Dampp-Chaser installations, containing tools, a parts box and a drill.
Needless to say, this was all very cumbersome, not to mention heavy. I would totter along like one of those pickup trucks you see in Chicago alleys, weighted down with scrap metal piled thirty feet high, and the wheel wells scraping the ground, that you’re sure is about to tip over at any turn. Although, come to think of it, I’ve never actually seen one turn. It’s possible they only go in one direction and aren’t capable of turning.
Anyway, usually the plastic undercover package would squirt out from under my arm and skid down the sidewalk a few feet after accidentally kicking it, and I’d either have to put everything down to pick it up, or backtrack and go pick it up later after dropping everything else off inside. By the time I got to the job site, my knuckles were white and my shoulders were about to give out.
So, since I’ve been doing more and more Dampp-Chaser installations the last few years, at some point I decided the time had finally come to streamline, consolidate, lighten, and rethink my Dampp-Chaser tool case and optimize the tools inside it.
(All of the products mentioned below change quickly, so some may not be available any longer at the time of this printing, however, if you search around, you may be able to find products with the same or similar features.)
The Tool Case
I’d been thinking for a while that I didn’t need to schlep my regular tuning tool case around to carry only three or four tools that could easily be duplicated and dedicated to the Dampp-Chaser tool case. Also, the tool case with a drill and other tools, which I had been dragging around for Dampp-Chaser installations, was too heavy. So, it was past time to consolidate the two cases into one and significantly lighten the load.
Now the question was what was I going to replace them with?

The Old Dampp-Chaser Tool Case
Pros:
-Sturdy and rugged
-Shoulder strap
Cons:
-Heavy
-Zippered opening - When I bought it I thought the zipper would be a good idea to prevent tools from falling out, but it turned out to be a hassle to open and close the stiff zipper, so as a result it always remained open.
The New and Improved Dampp-Chaser Tool Case
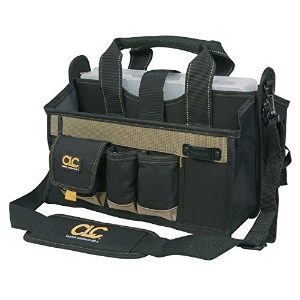
Leathercraft 16” tool bag. Available online and at some hardware stores.
It took a lot of searching on the internet to find an open top tool case that was, not only the right size, but had a shoulder strap, was lightweight, and had the necessary pouches, tool straps and a place to put a tackle box for miscellaneous Dampp-Chaser clips and screws.
Pros:
-Lightweight, but sturdy enough for the intended purpose
-Open top with no zipper
-Lots of loops, pockets and pouches to put tools and supplies and a drill
-Center compartment for tackle box
-Shoulder strap and handles
Cons:
-Reviews I read online mentioned, that if there are heavy tools in the tool pouches, the center compartment can collapse or fall over on itself when the tackle box is removed. To remedy this, I went to a friend who owns a sign store and got some lightweight, thin, but stiff, plastic sheeting, cut it to size and riveted it to the inner walls of the center compartment. Worked like a charm.
Drill vs Driver

The Old Drill
I love this drill. It was a best buy on Consumer Reports, and a very powerful bad boy with a great LED, but I no longer keep it in the new and improved Dampp-Chaser case, because but it alone was 5 lbs. and was too heavy, unwieldy, and just more drill than is needed for Dampp-Chaser installations. I still use it for heavy use jobs around the house though, or if I know I’ll be doing a lot of heavy drilling, such as with a vertical piano dolly installation.
Pros:
-Very powerful and smooth
-Versatile chuck for any screwing or drilling needs
-LED that illuminates the area about to be screwed and stays illuminated before and even after drilling
-Lithium-ion battery that maintains a charge for months
Cons:
-Heavy
-Cumbersome
-Difficult to fit in tight areas

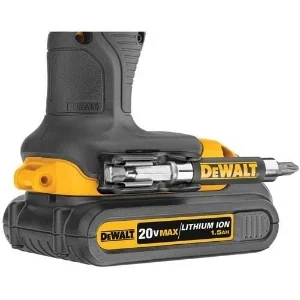
The New and Improved – Hex Impact Driver
My requirements for the new drill were that it had to be smaller, significantly lighter, have an LED that illuminated the actual drilling point, and yet be powerful and reliable enough to do the job.
However, such a drill was not possible to find. The sticky wicket was the LED. In an area underneath a grand piano, where it can be very dark, an LED is something you can’t live without once you get used to using it. You would think this would be a no-brainer on every drill these days, but the problem is that the chuck often gets in the way of the beam of light, so that although many drills have LEDs, most, if not all, of the smaller drills do not actually light the point at which you are about to drill, but rather annoyingly above or below it.
So, my search for the ultimate drill turned in an unexpected direction, and I wound up not getting a drill at all, but an impact driver. At the time I knew nothing about impact drivers. I’d seen them in hardware stores, but never really bothered to find out what they were for. So, once I started considering going in that direction, I did my research by watching a lot of YouTube reviews and demonstrations on them.
The impact driver is used more for driving in screws, as opposed to drilling, and offers quicker and more powerful rotational torque than a conventional drill. The big disadvantage is that it is not great for drilling holes, and although you can get a hex chuck adapter that will fit in the driver for drilling in a pinch, it is very wobbly and you’re better off using a real drill if precise or heavy drilling will be required.
Still, the impact driver is fun to use. Those screws zip into even the densest wood surprisingly fast and easy. The stubbier profile also makes it easy to fit into areas between the beams, so I find that I don’t need to use 90-degree adapters as often. And of course it’s less than 2.5 lbs. so it’s very maneuverable.
Pros:
-Lightweight
-Easy to handle
-Smaller size
-Fits into tight spaces
-Easy and quick rotational torque for driving in screws
-3 LEDs on the nose of the driver that illuminate the entire screwing area
-Lithium-ion battery that maintains a charge for months
Cons:
-Not for precise drilling of holes or heavy duty drilling
-Not as versatile
The Work light

The Old Work Light
The old work light was useful for a while, but I found that I was sweating like crazy due to the heat from the lamp, which often made me wonder if it was affecting the tuning as well. It was also bulky and not collapsible, so it couldn’t be kept in the trunk, and required an electrical cord and outlet.
Pros:
-Good for general lighting
Cons:
-Gives off a lot of heat
-Uses an electrical cord and requires an outlet
-Bulky and not compact

The Next Old Work Light
When I found that other more compact, lightweight, cordless, battery powered LED options were available, I immediately jumped on it. I ordered a work light that used the same 12-volt battery as the impact driver. Perfect, right?
Unfortunately, although the light was exceedingly bright, it was very focused in one spot and unable to be widened out or diffused. When I turned it on under a piano, even shining on the black beams, the glare was so intense that I couldn’t see well. I decided not to use this for Dampp-Chaser installations, but I still keep it for use in my shop when I need a bright light for action work.
Pros:
-Compact and folds up
-Lightweight
-Uses same 12 volt Lithium-ion battery as impact driver
-Battery maintains a charge for months
-Doesn’t get hot
-Doesn’t require an electrical cord or outlet
Cons:
-LED is not a floodlight, but an intense beam that’s too focused for this use
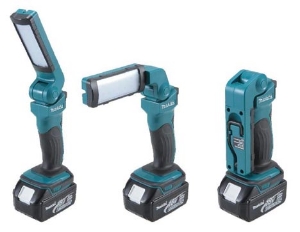
The New and Improved Work Light
So, I decided to find something that was more of a general flood LED work light, and since I already had the heavy-duty drill that came with two 18-volt batteries, I looked for an LED floodlight that could use the same batteries.
This LED floodlight is a little larger and heavier in weight than the 12-volt model, described above, that I decided not to use, but still fairly lightweight and able to fold up and fit in the tool case quite well. It also provides an excellent floodlight that illuminates the entire underside of the piano and makes a great work light.
Most LED work lights are sold without a battery, so if you wind up getting one, be sure that you already have the batteries and charger that go along with it, and since most drills or impact drivers come with two batteries included, it may not be necessary to buy an additional battery if you already have a spare.
Pros:
-Good general LED floodlight with several intensity settings
-Compact and folds up
-Fairly lightweight
-Uses same 18 volt Lithium-ion battery as the heavy duty drill
-Battery maintains a charge for months
-Doesn’t get hot
-Doesn’t require an electrical cord or outlet
Cons:
-None
Other Special Tools
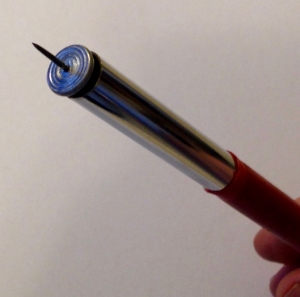
Steel Tube Tack Driver
6” piece of steel tubing for easily driving in the tacks that hold up the dehumidifier rod in a vertical installation. If you’ve ever dropped or bent a few tacks trying to get them in between the pedal rods, you’ll understand how useful this simple tool can be.

Combination Hammer/Tack Remover/Pliers/Wire Cutter
The real name for this tool is an Arrow Picture Hanging Hammer. It’s a nice combination tool that includes a light hammer to drive in the tacks mentioned above, pliers for pulling the tacks out if you get the them in the wrong place, and a wire cutter for snipping plastic and wire cord ties.

Right Angle Drill Adapter
Changes the angle 90-degrees on any drill or impact driver when you can’t fit it into a tight space. This particular one is made by Milwaukee.
Bit holders
A useful accessory that mounts to the handle of a drill or impact driver for storing bits when not in use. Some drills come with these already included, but most don’t. I have one on each side.
Bits
Magnetic Hex Bit
It’s a lot easier to hold the screws with a magnetic hex bit.
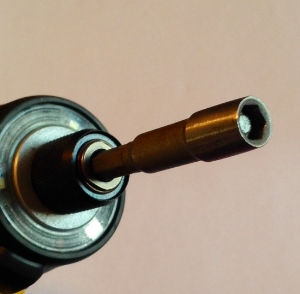
Modified Magnetic Hex Bit
You may have noticed that the magnetic hex bits are too wide to fit into the clamps that hold up the grand dehumidifier rods. I modified one by grinding down the sides, so that it fits nicely into the clamp.

Double-ended Phillips/Slotted hex bit
Very handy, but the trick is to find one that fits into a hex impact driver. This one does!
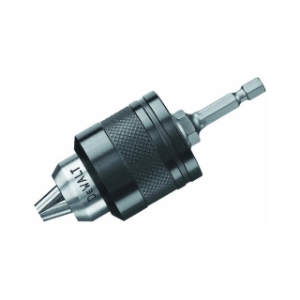
Hex drill chuck adapter
For general drilling needs using the impact driver, when precision isn’t of paramount importance.
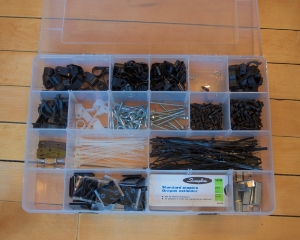
Spare parts box
I hope this has been helpful as a general guide for some things to consider in your own search for the perfect tool case. In a piano technician’s world it’s a never-ending quest, but always a fun one.
Visit our online store for
Piano Life Saver replacement products & supplies.